

“Animation is not the art of drawings that move, but the art of movements that are drawn. What happens between each frame is more important than what exists on each frame.”
These words from Norman McLaren, a pioneer of hand-drawn animation, perfectly capture the essence of animation. But what did he really mean?
For an object to appear in motion, it must change position over time. The way we control the speed and degree of change between frames is what creates the illusion of life. Two fundamental principles of animation bring this illusion to reality: timing and spacing.
In this blog, we’ll explore Timing and Spacing in animation—what they are, why they matter, and how to apply them effectively to bring your animations to life.
Let’s get started!
Timing in animation refers to the speed at which an action takes place, determined by the number of frames used for movement. More frames make the action slower and smoother, while fewer frames create a faster and snappier motion. Proper timing helps animations feel natural by reflecting real-world physics.
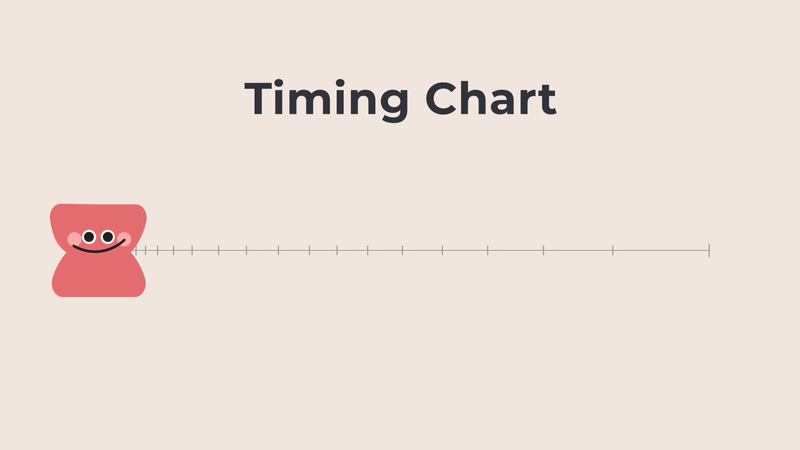
An Animation Timing Chart is a visual guide used by animators to plan how an object’s movement progresses between two keyframes. It helps control both timing (when an action happens) and spacing (how far an object moves between frames).
The chart typically consists of a straight line connecting point A (starting position) to point B (ending position), with evenly or unevenly spaced marks in between representing individual frames. The closer the marks are, the slower the motion; the farther apart they are, the faster the motion.
By using a timing chart, animators can create smooth, controlled movement, ensuring that acceleration, deceleration, and other motion principles are applied effectively.
To create natural and engaging animations, designers must carefully apply timing based on key factors that influence movement. Here are 3 essential factors to consider:
Learn more: UI/UX design definitions and processes to expand your knowledge and apply them to your projects.
Spacing in animation refers to how the position of an object changes from frame to frame. It controls the smoothness of movement. By adjusting animation spacing, animators can create different motion effects, making animations feel more natural and dynamic.

In Adobe After Effects, spacing is not directly visible in the UI, but there is a simple trick to make it easier to see: using the “Echo” effect. This effect helps display multiple frames of an animation at once, allowing you to understand how spacing changes over time and fine-tune motion easily.
Steps to Visualize Spacing with the Echo Effect:
You may want to read more: Emotional Design – The Secret to Impactful Storytelling
To sum up, timing and spacing are core principles that work together to create believable and expressive animation. Timing determines how long an action takes, while spacing controls how the movement appears between frames. By carefully adjusting timing and spacing, animators can convey different forces, weights, and emotions.
Mastering the balance between timing and spacing is key to creating animations that feel natural, dynamic, and full of life!
Read more: When designing for mobile devices, you should also explore UI/UX design principles for mobile apps to ensure the best experience across all platforms.
Timing and spacing are two fundamental principles that bring animation to life. Timing controls when an action occurs and how long it lasts, depending on the number of frames used—more frames create slower motion, while fewer frames make it faster. Spacing, on the other hand, determines how an object moves between frames; even spacing results in smooth, steady motion, while varied spacing adds realism, weight, and impact. Together, these principles shape the rhythm, believability, and expressiveness of animated movement.
The principles of animation are a set of foundational techniques developed by Disney animators Ollie Johnston and Frank Thomas in The Illusion of Life to create more natural, expressive, and appealing motion. These 12 principles include:
In 2025, Autodesk Maya remains a top choice for 3D animation, offering powerful modeling, simulation, and rendering tools widely used in film and gaming. Blender, an open-source alternative, provides a complete 3D pipeline for both professionals and hobbyists. For 2D animation, Toon Boom Harmony is the industry standard, supporting both traditional and cut-out animation, while Adobe Animate is ideal for vector-based animations, especially for web and mobile platforms. Meanwhile, Adobe After Effects stands out for motion graphics and visual effects, making it an essential tool for animators integrating animations into video projects.


